
I’ve had lots of messages appearing in my inbox, imploring me to share my secret. “Hope you don’t mind me asking this,” one of my lovely followers asked me, “but what camera do you use? Your photos are crystal clear!” “Do you use a light box [or just] a really good camera?” inquired another.
It always makes me chuckle a little, as I can see myself in my mind’s eye, balancing on the edge of the worktop or squished into the bath, precariously balancing my iPhone 7 on my knee, eager to get just the right angle before taking my photo.
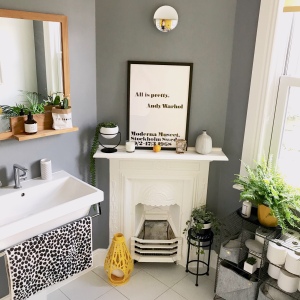
If you look very carefully, you can see my reflection in the wall light, standing in the bath!
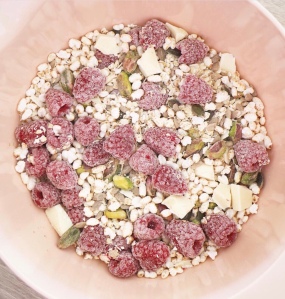
Camera phones are so advanced these days (I have to say the 7 plus seems to be especially good and a big improvement on the 6) that, in my opinion, it’s pretty much all you need as a amateur ‘Insta photographer’. That said, I can’t deny that I would love to get my hands on an incredible camera for those superb close up shots that make you drool over the subject, (even if it is some left over pizza from last night’s takeaway!)
Sarah from Instagram page @theselittlesquaresofmine uses a Canon EOS 750 D to take stunning shots of her home, and delicious culinary creations
There are some loose ‘rules’ I follow when setting up a shot, however. The main one is; unless you are capturing a moody evening shot where only candlelight will create that intimate ambiance, always take your picture when you have ample daylight available.
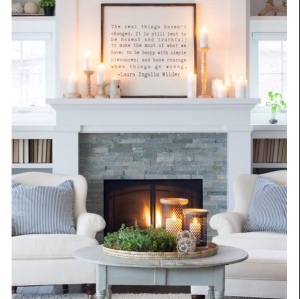
You can afford to have less natural light if you’re focusing on creating a cosy ambiance with fire and candlelight. Photo credit Pinterest
Early morning or early evening is a good time, as the light is softer, and won’t cause strong shadows or reflections. Artificial light (overhead pendants, strip lights, spots etc) is generally a no no – as it can change the colour of your decor, making the room appear to have a yellow tinge (great only if you’re aiming for a 70’s vibe…) Professional photographic lights which emulate sunshine, however, can be helpful to light up a dark corner. You can purchase artificial lighting kits, fairly inexpensively for this purpose, but bear in mind they can take up a lot of room, so you need to have space to store them.
There are a plethora of apps available to help lighten and adjust your photos to present them at their best. I’ve tried a lot of apps but I prefer ‘Instasize’ – it’s very easy to use and there’s just enough tools to make your photos pop without the need for filters. Snapseed, Photoshop and VSCO are other possible options.
Which brings me nicely onto the subject of filters. To use or not to use? I think if your aim is to become an influencer – using your stylish home interior and photographs to aid businesses in advertising their wares- then steer clear of filters. They can change the colour of their products and therefore won’t accurately represent them to potential purchasers. If your aim is to have a seamless feed – beautifully cohesive, in one attractive shade, then go for it. Choose one filter and use it on all your shots. Personally, I never use filters, only taking the time to adjust the exposure, contrast, brightness and saturation of my photos.
Before
After
Now, it’s no lie that full room shots are the most popular to viewers on Instagram. There’s plenty to satisfy and inspire in those kinds of photos – furniture, artwork, plants, cushions etc.
Lucinda from @nest_twenty_eight has achieved a following of more than 70k almost exclusively using full room scenes
When photographing a whole room, stand as close to the wall as possible, preferably in a corner, to include as much of the room as you can.
That said, I am personally also a fan of the ‘close-up’. It keeps your squares varied and interesting and gives you a chance to show off your fave teapot (I love my ever-growing teapot collection), flourishing monstera plant or new throw blanket. Whilst, ideally, you want your pictures to get plenty of likes, it’s your page, and you can get creative and have fun! If you like taking close-ups – go for it. Do what feels natural to YOU. I find the ‘portrait’ option on my phone great for these particular shots. If I get the distance between myself and the object just right, my iPhone will create a crisp photograph of the item, and blur out the background which can be a beautiful effect.
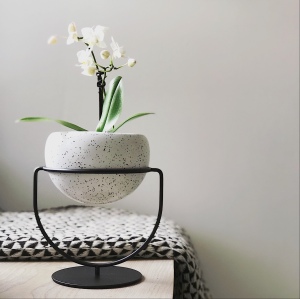
When I acquired this gorgeous Umbra planter, I wanted to show off its beauty with a simple close-up
With regards to angles, I generally feel that straight on is the way to go. Ensure your camera/phone is lined up perfectly, so all vertical lines go straight down, and don’t taper off diagonally as this will look like the interior is falling toward or away from you. You can use the aid of a tripod (I have a ‘GorillaPod’ which very easy to use and ample if shooting with a phone) to ensure your wobbling hand doesn’t ruin your nicely composed image.
To make a room feel cosy and welcoming, instead of taking the photo standing up, sit on a chair and shoot from a lower angle. Sometimes standing on a chair, looking down makes a nice change too, especially if photographing a beautifully set dining table, for example.
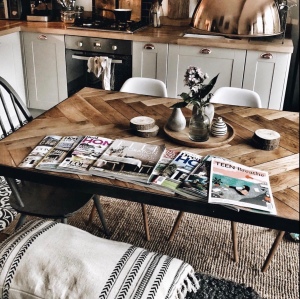
Instagrammer @hygge_for_home has taken this successful shot of her dining table from above
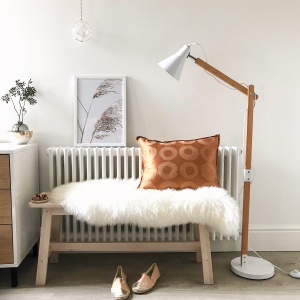
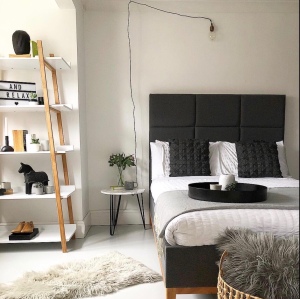
Lastly – styling. This is something that I feel I’ve always struggled with, but when I look at my photographs taken almost 6 months ago when I first started my Instagram page, I realise how far I’ve come. I used to just point and shoot an area in my home without thinking at all about the details and how I could improve the styling to create a beautiful composition. Now I shop my home, collecting items of a similar colour or style and bring them to the area I am about to photograph. I take some time to move things around, adding and omitting, until I feel I have something that looks inspiring, coordinating and interesting to the eye. Even the smallest details like lighting an unlit candle, or adding some fairy lights can add something special and enhance your photo. Be careful not to over-style though. If you add too many accessories, or something that wouldn’t naturally be there, it can make the photo seem chaotic or unbelievable. Keep it simple. After all, if you add an dining chair to a bathroom shot, or have your favourite towel draped over your office chair, it’s going to look unnatural.
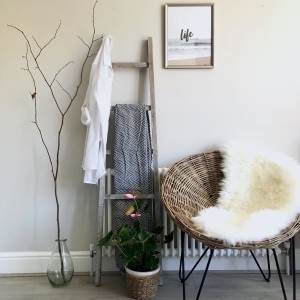
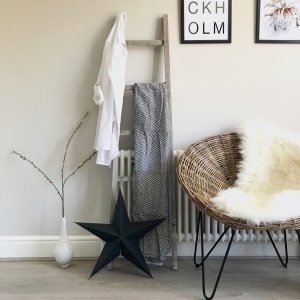
Here are two shots of the same area – by mixing up the accessories, you end up with two slightly different looks, inspiring others with your styling ideas
I hope you’ve enjoyed reading, head over to my Instagram page @lifeatnumber63 for a look at some more of my photos – hopefully you’ll find some inspiration to aid you on your Instagram journey.
Kat x

Brilliant read!!! Xxx
LikeLiked by 1 person
Thank you Emma! Thanks for stopping by xx
LikeLike
Some really great tips in here – your photos are always fab so this has inspired me to try a little harder! xx
LikeLiked by 1 person
Awww thank you so much! I’m so glad you found it useful, thanks for reading xx
LikeLike